


A dull cutting chain turns light yard trimming into a frustrating chore by producing fine powder instead of clean wood chips and generating excess friction against the guide bar. When small cordless powerheads struggle to slice through garden branches, learning how to sharpen mini chainsaw teeth restores aggressive cutting speed while reducing strain on the electric motor. Much like mastering proper axe swinging mechanics for splitting firewood, maintaining sharp chain cutters ensures clean severance and prevents unwanted tool kickback. Dull teeth also force operators to lean into cuts, accelerating rail wear and draining compact battery packs prematurely.
Maintaining small chain teeth requires consistent filing angles, accurate depth gauge clearance, and the correct diameter sharpening tool matched to the narrow chain kerf. Whether utilizing a manual round file kit like the Husqvarna X-Cut S93G Chainsaw File Kit for 3/8″ or a battery-powered grinder like the Sharp Pebble Electric Cordless Chainsaw Sharpener, precise tooth geometry makes all the difference in cutting efficiency. Setting up a stable workspace and inspecting cutter condition before touching metal to tooth helps preserve cutting performance across multiple yard seasons. With regular maintenance, your compact cutting tool will slice through limbs cleanly and reliably.

Pros
- Cordless design means you can sharpen in the field, on a ladder, or in the shop without cords
- Multiple wheel sizes included so you can match your chain pitch exactly
- Angle guide ensures each tooth is sharpened identically for balanced cutting performance
- Lightweight at 1.39 pounds, easy to carry and store in a toolbox or chainsaw bag
- Adjustable speed helps prevent overheating and gives a finer edge on each tooth
Cons
- Battery life may limit use for large jobs or multiple chains in one session
- The learning curve for aligning the guide properly can take a few tries for new users
- Plastic housing may not survive a drop on concrete as well as metal alternatives
The Sharp Pebble Cordless Chainsaw Sharpener Kit is a battery powered tool designed to replace the slow and inconsistent hand filing method. It targets anyone who owns a chainsaw and values time savings and a razor sharp edge. That includes DIY homeowners cutting firewood, mechanics maintaining property, woodworkers prepping lumber, and contractors keeping their saws in top shape on the job site.
Performance wise, the biggest advantage is the consistent angle and depth the sharpener provides. Each tooth gets the same treatment thanks to the adjustable angle guide. Users can set the grinding angle, then cycle through the chain, and every cutter comes out equally sharp. The four included file sized wheels cover common chain pitches, so you won't have to buy separate wheels for different chains. The adjustable speed helps manage heat and gives a cleaner finish compared to a fixed speed version.
Build quality is practical for a portable tool. The body is lightweight plastic with an orange and black scheme, and the motor uses high quality bearings for stable disc rotation. The ergonomic grip and trigger make one handed operation possible, which matters when you're holding the saw or working in tight spaces. The angle guide attaches firmly, and the included wrench makes wheel changes quick. It's not a heavy duty industrial unit, but for home and pro use it feels solid enough.
Setup takes a minute: charge the battery (not specified if included, but the kit likely includes a battery; based on typical cordless tools), slide on the appropriate wheel, attach the angle guide, and set the depth stop. The learning curve is short, though aligning the guide perfectly with the chain's top plate takes a few tries. Once locked in, you can sharpen a full chain in minutes. Storage is easy given its compact size; it fits in a toolbox or chainsaw bag without taking much room. No special maintenance beyond keeping the wheels clean and the battery charged.
A realistic limitation is battery life. If you have a half dozen chains to sharpen in one go, you might need a spare battery or a break for recharging. Also, the plastic housing, while light, is less durable than a metal case if dropped. Some users might prefer a corded unit for non stop work, but the freedom of cordless makes up for it in most scenarios. The four wheel sizes cover common chains, but if you have an oddball pitch, you may need to buy additional wheels separately.
Overall, for anyone who regularly uses a chainsaw and wants to keep it cutting safely and efficiently, this Sharp Pebble kit is a solid buy. It saves time, reduces hand fatigue, and delivers consistent results that hand filing can't match. DIY homeowners, mechanics, woodworkers, and contractors will all find it a practical addition to their workshop or garage. Just keep an extra battery handy for extended sharpening sessions.

Pros
- Combination roller guide makes maintaining correct filing angles simple and repeatable
- Includes both round cutting files and a flat file for rakers in one kit
- Ergonomic handle works with both file types for comfortable tool control
- Lightweight, portable package suited for both the workshop bench and remote jobsites
Cons
- Tailored strictly for 3/8-inch mini pitch chains and will not fit standard 3/8-inch or .325-inch setups
- Does not include a dedicated hard storage roll or heavy-duty pouch
Keeping a chainsaw chain properly tuned is essential for clean timber cuts and operator safety. The Husqvarna X-Cut S93G Chainsaw File Kit is a specialized manual sharpening system configured specifically for low-profile 3/8-inch mini pitch chains. Designed with practical field maintenance in mind, this compact kit supplies the core components required to dress cutter teeth and adjust depth gauges without hauling powered grinding equipment into the woods.
This sharpening kit serves a wide range of users, from homeowners tackling seasonal firewood and storm cleanup to landscapers, woodworkers, and tree care contractors. Chainsaw chains dull quickly after contacting dirty bark or incidental ground contact, which causes the motor to bog down and increases the risk of kickback. Having a dedicated hand-filing kit readily available allows users to quickly restore clean cutting action directly on the saw bar.
In terms of practical performance, the standout component is the Husqvarna combination roller guide. This guide rides directly over the saw chain links, locking the round file into the correct height and horizontal cutting angle. The integrated rollers allow smooth back-and-forth strokes, reducing friction and preventing uneven cutter wear. The companion depth gauge plate ensures flat filing across rakers remains precise, maintaining proper bite depth for smooth chip clearance and reduced vibration during crosscutting.
Build quality matches the practical requirements of outdoor equipment maintenance. The round and flat files are constructed from hardened steel designed to bite into tough cutter alloys without premature dulling. The interchangeable composite file handle provides a non-slip grip that helps maintain direct downward pressure and directional control, while the stamped steel guide stands up well to regular contact with chain steel and bar oil.
While this kit delivers dependable results, compatibility is strictly limited to 3/8-inch mini pitch chain configurations such as the X-Cut S93G. Users running larger standard 3/8-inch, .325-inch, or .404-inch chains will require different file diameters and guide spacings. Additionally, the included packaging serves primarily as retail blister packaging, so users may want to add a canvas tool roll or protective sleeve to keep the files clean inside a saw box.
For anyone running a compact or top-handle chainsaw equipped with mini pitch chain, the Husqvarna S93G Sharpening Kit is an economical, job-ready tool accessory. It simplifies the math and guesswork behind tooth geometry, making chain upkeep straightforward whether working at the garage workbench or deep on a timber lot.
The Husqvarna X-Cut S93G File Kit is engineered strictly for chainsaws utilizing 3/8-inch mini (low-profile) pitch chains. It directly matches the tooth profiles found on Husqvarna X-Cut S93G chains and comparable low-profile consumer and arborist chains. It is not compatible with standard 3/8-inch full-size chain, .325-inch pitch chain, or 1/4-inch micro chains.
Restoring Peak Cutting Performance to Your Mini Chainsaw
Restoring razor sharpness to a mini chainsaw chain requires maintaining precise cutter angles, matched file diameters, and balanced depth gauge heights. Compact cordless chainsaws rely on smaller motor wattages than gas saws, meaning any dullness immediately strains the drive system and drains battery cells. Understanding how each cutting component functions allows you to remove minimal steel while producing aggressive, uniform wood chips. With the right tools and a disciplined filing routine, your compact saw will slice straight through branches without binding or smoking.
Identifying Mini Chainsaw Chain Specifications and File Sizing
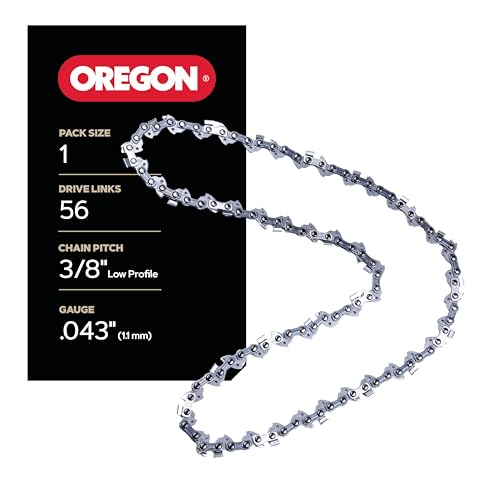
Before sharpening your saw chain, you must determine its pitch, gauge, and recommended file diameter. Most mini chainsaws utilize either compact 1/4-inch pitch chains or narrow 3/8-inch mini low-profile chains with a .043-inch gauge. Using an incorrect file diameter alters the cutting hook angle, creating either a brittle edge that chips or a blunt face that refuses to bite. Matching your sharpening stone or round file to the chain pitch guarantees that the top and side plates receive the correct hollow-ground profile.
For chains with a 3/8-inch mini pitch, a dedicated file kit like the Husqvarna X-Cut S93G Chainsaw File Kit for 3/8″ provides properly proportioned round files and a matching roller guide. If you prefer high-speed rotary sharpening, tools like the Sharp Pebble Electric Cordless Chainsaw Sharpener supply multiple wheel sizes including 5/32-inch, 3/16-inch, and 7/32-inch wheels to accommodate different chain profiles. Mini chainsaw chains almost universally require the smallest 5/32-inch diameter wheel or file to fit inside the tight cutter gullet. Verifying your chain specifications in the owner manual prevents accidental structural damage to drive links during sharpening.
Checking the drive link stampings helps confirm whether your chain features semi-chisel or micro-radius cutters. Semi-chisel cutters feature a rounded working corner that tolerates gritty bark and light dirt contact far better than square-cornered teeth. Because mini chainsaws often prune low limbs near soil, semi-chisel geometry is the preferred industry standard for small yard saws. Preserving this radius during sharpening ensures dependable edge durability across seasonal trimming tasks.
Essential Safety Precautions and Workspace Setup Before Filing
Sharpening power tool cutters demands strict physical safety controls to prevent accidental motor starts and severe lacerations. Always detach the lithium-ion battery pack completely from the mini chainsaw powerhead before inspecting or touching the cutting teeth. Removing the power source eliminates any hazard of inadvertent trigger engagement while your fingers guide the file along the bar. Wearing heavy leather or cut-resistant work gloves protects your hands against slips on sharp steel teeth.
Securing the chainsaw in a bench vise provides the physical stability needed for consistent filing strokes. Clamping the guide bar gently between soft jaws or scrap wood blocks prevents wobble without crushing the internal oil channels. If you are working out in the yard away from a workbench, resting the tool firmly across a flat log provides adequate support. Ensuring the guide bar cannot shift allows you to apply uniform pressure along the cutter face with both hands.
Good lighting and a clean chain are equally vital for assessing cutter wear and metal removal. Wipe away caked bar oil and wet sawdust using a stiff nylon brush and a mild degreaser before sharpening. Inspect each cutter under direct task lighting to identify chipped chrome, rounded working edges, or rock damage. Marking the shortest cutter with a permanent felt marker establishes your master tooth, ensuring all subsequent cutters are filed to an identical length.
Manual Hand Filing Technique Using Guide Rollers and Round Files
Manual filing remains the most reliable method for maintaining tooth geometry without overheating or removing excessive steel. Mount a clean 5/32-inch round file into a comfortable handle and place the combination file guide squarely across the guide bar rails. Position the file in the cutter gullet so that roughly one-fifth of the file diameter extends above the top plate cutting edge. Align your stroke with the manufacturer angle etched into the cutter top plate, which is typically set at 30 degrees relative to the guide bar.
Execute smooth, forward-pushing strokes directly from the inside of the cutter out toward the exterior edge. Chainsaw files only cut metal on the forward push, so lift the file off the tooth on the return stroke to avoid dulling file teeth. Maintain steady, horizontal pressure while rolling the file slightly with your wrist to clear metal shavings out of the gullet. Apply three to five uniform passes per cutter until the chrome edge shows a crisp, razor-sharp line.
Sharpen all cutters facing one direction first before adjusting your stance to tackle the opposite side. When clearing limbs and overgrown brush, pair your cutting routine with appropriate property tools like a clearing small saplings guide to maintain total yard productivity. Completing all right-hand cutters before addressing left-hand cutters maintains muscle memory and angle consistency across the loop. Maintaining equal cutter lengths prevents the guide bar from drifting or binding during heavy crosscuts.
Using Cordless Rotary Sharpeners with Guided Angle Attachments
Electric rotary sharpeners offer a fast, motorized alternative for reviving severely dulled mini chainsaw chains. A dedicated kit like the Sharp Pebble Electric Cordless Chainsaw Sharpener provides high-speed grinding without requiring an electrical outlet nearby. Thread the correct 5/32-inch sharpening wheel into the spindle and secure the angle guide attachment firmly over the collar. The angle guide features clearly scribed angle markers, enabling operators to maintain the mandatory 30-degree grinding angle without guessing.
Operate the rotary tool at moderate speed settings to avoid building excessive friction heat within the cutter tooth. Excessive grinding heat draws the temper out of hardened chain steel, turning the metal blue and leaving the tooth soft. Bring the spinning abrasive wheel into gentle contact with the cutter face for one or two brief seconds at a time. A light touch produces a clean finish along the cutting edge while preventing discoloration and premature tooth breakdown.
Cycle steadily through the chain by advancing each drive link by hand while keeping the motor switched off between teeth. Check your progress frequently by wiping away metal dust and inspecting the cutting lip under bright light. If a tooth suffered severe damage from soil contact, take multiple short passes rather than grinding heavily in a single application. Uniform grinding across every tooth guarantees that each cutter takes an equal bite out of the wood kerf.
Measuring and Adjusting Depth Gauges for Smooth Kerf Clearing
The curved metal fin sitting immediately in front of each cutter tooth is known as the depth gauge or raker. Depth gauges do not cut wood directly; instead, they regulate how deeply the following cutter tooth bites into the timber grain. If depth gauges sit too high, the cutters glide across the wood surface without biting, generating friction smoke and fine powder. If depth gauges are filed too low, the teeth bite aggressively, creating heavy vibration, motor stalling, and kickback hazards.
Mini chainsaw chains typically require a precise depth gauge clearance of .025 inches (0.65 mm) below the top plate cutting edge. Place a progressive depth gauge tool or combination roller guide flat across the tops of the cutters. Any portion of the raker fin protruding through the guide slot must be filed flush using a standard flat file. Kits like the Husqvarna X-Cut S93G Chainsaw File Kit include a matching flat file designed specifically for this calibration task.
After filing the depth gauge down flush with the guide, round the front leading corner of the raker fin with a light stroke. Maintaining a rounded profile helps the raker glide smoothly across wood grain without grabbing or chattering. If you regularly tackle dense growth and tangled brush, reviewing brush cutter blades for heavy clearing helps match the right cutting mechanism to tough stems. Proper raker tuning balances aggressive cutting bite with smooth, manageable tool control.
Diagnostic Troubleshooting: Crooked Cuts, Burrs, and Premature Dulling
A chainsaw that cuts in an arc or pulls heavily to one side indicates an imbalance between the left and right cutter sets. When cutters on one side of the chain are shorter or filed at shallower angles, the sharper teeth pull harder through the kerf. Measure the top plate lengths across several teeth on both sides of the chain using a small pocket ruler or caliper. File back the longer cutters until all teeth match the length of your master tooth, restoring straight tracking through every cut.
Fine powdery sawdust instead of distinct wood chips is the universal symptom of dull cutting edges or high rakers. When a chain is properly sharpened, the powerhead self-feeds smoothly through timber under its own weight without requiring downward force. If you must lean your body weight onto the mini chainsaw handle to force a cut, the teeth are scraping rather than severing fibers. Continuing to cut with dull teeth overheats the guide bar, strains the motor, and drains battery runtime quickly.
Inspect the cutter edges for microscopic burrs or curled wire edges after completing your filing routine. A curled wire burr creates immediate friction on your first cut and snaps off quickly, leaving an irregular cutting face behind. Lightly pass a smooth wooden dowel or fingernail across the inside gullet to verify that the edge feels crisp and free of ragged burrs. Addressing burrs immediately ensures the chrome plating stays intact through multiple cutting passes.
Proper Chain Tensioning and Lubrication Protocols Post-Sharpening
Sharpening metal removes cutter mass and can slightly shift chain alignment along the guide bar rails. After filing is complete, check chain tension by pulling down gently on the bottom strand of the chain using gloved fingers. The drive links should not sag out of the bar groove, yet the chain should still snap back snugly against the rails upon release. You should also be able to pull the chain freely along the bar track by hand without feeling resistance.
Mini chainsaws often feature tool-less side tensioning knobs or standard dual-stud scrench nuts to secure the guide bar. Loosen the bar mounting nuts slightly while lifting the bar nose upward before tightening the tension screw. Once correct tension is established, fully tighten the bar clamping nuts while supporting the bar tip to prevent rail sagging. Operating a mini chainsaw with a loose chain risks derailment, which damages drive links and creates serious physical safety hazards.
Before making your first post-sharpening cut, replenish the bar and chain oil reservoir with high-tack chainsaw lubricant. Mini chainsaws run at high surface speeds across short guide bars, making adequate lubrication vital to prevent metal friction and rail burning. If your mini saw uses a manual bulb oiler rather than an automatic pump, depress the primer bulb two or three times to saturate the bar track. Hold the bar tip near clean cardboard and run the chain briefly to verify a light spray of protective oil.
Long-Term Maintenance: When to Sharpen and When to Replace the Chain
Establishing a regular sharpening schedule prevents severe cutter wear and extends the operational life of your mini chainsaw loop. Touching up the teeth with two light file strokes every time you recharge or swap a battery pack maintains peak sharpness with minimal effort. Waiting until the chain is completely blunt requires aggressive grinding that removes excessive tooth steel and accelerates wear. Consistent maintenance keeps the cutting system operating at peak mechanical efficiency.
Every saw chain possesses a finite service life determined by the length of remaining cutter top plate steel. Look closely at the top plate of your cutters for the laser-etched witness line or wear indicator mark scribed into the metal. When filing wears the cutter back flush with this indicator line, the tooth has reached its minimum safe operational thickness. Continuing to sharpen or run a chain past this indicator mark increases the risk of tooth breakage during heavy cuts.
Discard and replace any chain loop that exhibits cracked drive links, missing cutter teeth, or bent tie straps. Running a physically compromised chain risks catastrophic link failure under load, which can throw metal fragments or damage the drive sprocket. Regularly inspecting the drive sprocket teeth for deep grooving and dressing the guide bar rails with a flat file keeps your cutting assembly working harmoniously. A properly maintained mini chainsaw delivers clean, effortless cuts across years of residential pruning and cleanup.
Taking the time to calibrate cutter angles, balance raker depths, and maintain proper chain tension transforms your mini chainsaw into an efficient, safe cutting tool. Always complete a gentle test cut in clean softwood scrap after sharpening to verify smooth tracking and chip production before tackling tough limbs. By combining consistent filing routines with diligent lubrication, you preserve your tool battery life and enjoy effortless wood cutting every time you step into the yard.




Write Your Review
No reviews yet. Be the first to share your experience!