


Mastering how to use a table saw is one of the most rewarding milestones for any woodworker or DIY builder. A stationary or portable table saw serves as the centerpiece of most modern workshops because it delivers unmatched precision, straight rip cuts, and repeatable dimensions across boards of various sizes. However, working with an exposed, high-speed circular blade demands thorough respect for mechanical setup, tool alignment, and defensive operating habits. When you understand how the workpiece interacts with the table surface, rip fence, and cutting teeth, you can produce clean joinery parts while dramatically reducing the likelihood of tool binding or kickback.
Operating this tool properly begins well before you flip the power switch. Inspecting your equipment, selecting the correct blade profile, and establishing stable workpiece support all play essential roles in every successful cut. Many woodworkers who transition from handheld tools like a circular saw quickly discover that stationary cutting requires completely different body mechanics and feed pressure techniques. If you also work with handheld equipment on job sites, our practical circular saw operational guide outlines how portable cutting principles compare to stationary table methods. Taking the time to study foundational workshop manuals and dial in tool settings ensures your projects remain clean, square, and safe.

Pros
- Clear, step-by-step visual instructions suitable for both novices and seasoned woodworkers
- Strong emphasis on preventative maintenance, arbor alignment, and jobsite safety practices
- Helpful guidance on building shop-made jigs that expand table saw versatility
- Large, easy-to-read paperback format that lies flat on a workbench during shop sessions
Cons
- Paperback cover and pages can accumulate sawdust and shop grime over prolonged garage use
- Focused exclusively on table saws rather than comprehensive shop machinery setup
- Some advanced woodworkers may already be familiar with the foundational joinery techniques
The Complete Table Saw Book, Revised Edition by Fox Chapel Publishing is an essential instructional manual designed to maximize the performance, safety, and versatility of workshop table saws. As the central centerpiece of most woodworking shops, the table saw demands precise alignment and proper handling to produce clean, repeatable cuts. This manual bridges the gap between basic equipment operation and refined woodworking technique, delivering clear guidance through fully illustrated walkthroughs.
This reference book is ideally suited for DIY homeowners, hobbyist woodworkers, cabinetmakers, and garage workshop users who want to move beyond simple rip cuts. Beginners will appreciate the grounded introduction to tool anatomy, blade types, and safety mechanisms such as riving knives and splitters. At the same time, experienced trade contractors and seasoned makers can benefit from deep dives into fine-tuning fence parallelisms, miter slot alignments, and building dedicated auxiliary jigs.
In terms of practical shop utility, the book emphasizes calibration techniques that directly improve cutting accuracy and reduce tear-out. Proper table saw tuning is critical for ensuring smooth motor torque transfer and avoiding blade binding, which is the primary cause of dangerous kickback. The text outlines methodical approaches to checking table flatness, squaring the arbor, and choosing the right tooth configuration for solid lumber versus veneered plywood.
The physical quality of the manual reflects its intended workshop environment. At over two pounds, the paperback features substantial paper stock with clear, high-resolution color photographs and detailed technical diagrams. The step-by-step project layouts make it easy to follow along at the workbench without squinting or deciphering confusing technical jargon. While the paper cover can collect dust or show shop wear over time, the binding is sturdy enough to hold up through regular project planning.
A minor limitation is that the book remains tightly focused on table saw operations, meaning woodworkers seeking a broader overview of jointers, planers, or bandsaws will need supplemental material. Additionally, highly advanced woodworkers might find some introductory safety sections familiar. However, the comprehensive troubleshooting charts and jig plans provide ongoing reference value that justifies dedicated shelf space.
Based on product specifications and user feedback, this manual is a dependable purchase for anyone adding a jobsite, contractor, or cabinet table saw to their workspace. It serves as a thorough roadmap for producing tighter joints, maintaining mechanical components, and fostering safe workshop habits during every cut.
A well-tuned table saw transforms woodworking projects from frustrating sanding marathons into smooth, precise assemblies. The techniques outlined in this guide emphasize fine-tolerance adjustments that eliminate burning on hardwood rip cuts and reduce blade deflection during deep bevels. Following the book's alignment routines helps ensure that the fence remains dead parallel to the blade kerf across the entire cut length.
Beyond machine tuning, the manual covers shop-built fixtures such as tenoning jigs, taper guides, and crosscut sleds. These shop accessories significantly expand the capability of entry-level and contractor-grade saws, allowing makers to achieve cabinet-grade results without investing thousands of dollars in commercial specialty accessories.

Pros
- Accessible, plain-language instruction tailored for beginner woodworkers and DIYers
- Compact 6 x 9 inch size stores easily right at your workbench or jobsite toolbox
- Strong focus on cut accuracy, blade safety, and safe workpiece clamping
- Covers essential fundamentals that save costly wood scraps and prevent mistakes
Cons
- Paperback reference guide rather than a hands-on physical tool or accessory
- Experienced carpenters and seasoned woodworkers may find the concepts too basic
- Lacks extensive project plans for advanced compound trim builds
Operating a miter saw can feel intimidating for beginners stepping into the workshop for the first time. This beginner woodworking manual from Majosta serves as a focused instructional resource, explaining how to set up, operate, and maintain one of the most essential cutting tools in the shop. Rather than wading through dense manufacturer safety booklets, this paperback offers an approachable walk-through of basic saw mechanics, workpiece positioning, and accurate angle adjustment.
The guide is ideally suited for DIY homeowners tackling their first trim jobs, hobbyist woodworkers setting up a garage workshop, and beginner remodelers who want to avoid common cutting errors. While seasoned framing contractors and cabinetmakers likely already know these techniques, novice builders will appreciate the clear breakdown of crosscuts, miter cuts, bevel cuts, and compound joints. It helps take the mystery out of angle gauges and alignment steps.
From a workshop utility perspective, the book emphasizes safe operating habits and precision cutting efficiency. Safe workpiece clamping, proper support for long boards, and kickback prevention are vital topics that protect both the user and the workpiece. By following structured alignment checks, woodworkers can eliminate sloppy cut lines, excessive blade tear-out, and wasted lumber on weekend trim projects.
In terms of format and practicality, the book measures a portable 6 by 9 inches and weighs only a few ounces. That compact footprint means it slips easily into a portable tool chest, rests on an assembly bench, or stores on a garage shelf without taking up valuable shop space. The print layout is straightforward, making it quick to flip open for a fast refresher before firing up the saw.
As a beginner-oriented guide, the book has realistic limitations. It does not replace hands-on muscle memory, nor does it dive into advanced crown molding jigs or commercial-scale carpentry techniques. However, for anyone who recently purchased their first miter saw and wants to build confidence, work safely, and achieve clean, accurate cuts, this handbook provides solid entry-level guidance at a minimal investment.
A well-prepared workshop relies just as much on solid technique as it does on sharp blades. Keeping an instructional guide nearby allows novice users to verify miter angle settings, workpiece stop setups, and blade clearances before hitting the trigger.
By standardizing simple safety habits such as allowing the blade to stop before raising the arm and securing short workpieces with clamps, this guide helps users prevent standard DIY accidents and build long-term confidence in their garage setup.
Pros
- Clear diagrams and photos make complex alignment steps easy to follow
- Applicable across virtually all band saw sizes and major machine brands
- In-depth focus on tuning guide blocks, thrust bearings, and blade tension
- Helps prevent costly blade breakage and poor resaw quality
Cons
- Paperback format requires a bookstand to keep fully flat on active workbenches
- Focused entirely on band saws rather than general stationary woodworking machinery
- Experienced commercial sawyers might find some basic setup chapters familiar
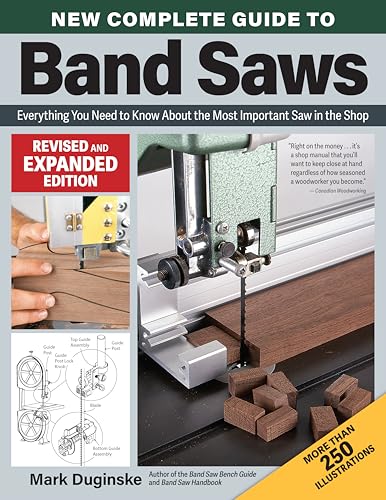
A band saw is widely recognized as one of the most versatile stationary machines in any woodworking space, but getting clean cuts requires precise mechanical setup. The New Complete Guide to Band Saws, Revised and Expanded Edition from Fox Chapel Publishing serves as a dedicated technical reference manual designed to demystify every mechanical component of the machine. Rather than offering vague advice, it breaks down the physics of wheel alignment, guide block adjustment, and blade tracking so operators can get consistent results from their equipment.
This guide is particularly well suited for woodworkers, DIY hobbyists, cabinetmakers, and garage workshop users who struggle with blade drift, rough curved cuts, or uneven resawing. Whether operating a compact benchtop model or a heavy-duty floor-standing cast iron saw, readers will find step-by-step guidance tailored to tuning up older used equipment as well as calibrating brand new shop machinery right out of the crate.
In terms of practical workshop value, the guide addresses the primary performance bottlenecks that cause poor cuts. By explaining how blade tension, tooth pitch, and feed speed interact, it allows woodworkers to dial in better cutting efficiency and superior surface quality. Proper alignment also reduces blade wear, prevents premature fatigue failure, and minimizes motor strain during aggressive resaw passes through dense hardwoods.
The physical book is formatted in a practical 8.5 by 11 inch size, making diagrams, illustrations, and technical callouts easy to digest while standing at the workbench. High-contrast imagery illustrates proper clearance tolerances between guide bearings and blade teeth, providing clear visual benchmarks for daily adjustments. The binding holds up well to regular reference use on a shelf or resting against a machine stand.
Because this is an instructional manual rather than a physical piece of shop hardware, readers must dedicate time to reading and applying the methods outlined across the chapters. Additionally, the softcover binding may benefit from a simple shop clip or bookstand to stay open hands-free during maintenance sessions.
For any woodworker looking to elevate their cutting accuracy and master machine maintenance, this volume is an exceptionally practical investment. It removes the trial-and-error approach from band saw operation, helping craftspeople achieve safer cuts, longer blade life, and better shop productivity.
Band saws require tighter mechanical tolerances than many woodworkers realize, and improper guide bearing placement often leads to wandering cuts. This reference manual directly targets those real-world garage challenges by detailing the exact mechanics of wheel coplanarity, thrust bearing offset, and miter slot alignment.
Having clear visual references while adjusting tension springs or aligning cool blocks saves substantial shop time. Instead of relying on guesswork or generic factory manuals, woodworkers can systematically troubleshoot vibration, squealing blades, or barrel-shaped resaw cuts.

Pros
- Thorough coverage of tool selection, proper handling, and workshop safety basics
- Practical advice on maintaining cutting tools, motor performance, and accessory fitment
- Clear reference layout suitable for keeping on the garage workbench during projects
- Helps beginners build confidence before investing in major stationary or handheld power tools
Cons
- Paperback format requires care to avoid shop grease, sawdust, and moisture damage
- Focuses primarily on foundational techniques rather than advanced commercial fabrication
- Information is instructional rather than a physical hand or power tool
Operating workshop equipment requires more than just pulling a trigger. How to Use Power Tools: A DIY Guide to Selecting, Operating, and Maintaining Workshop Tools Safety serves as a dedicated reference manual designed to bridge the gap between purchasing equipment and using it effectively. Published under the Master Your Workshop series by Majosta, this 8.5 by 11 inch manual organizes fundamental workshop practices into digestible chapters focused on equipment choice, handling mechanics, and preventive upkeep.
This manual is best suited for DIY homeowners, hobby woodworkers, and garage enthusiasts who are building out their first tool collection. Beginners who feel intimidated by high-torque drills, spinning circular saw blades, or benchtop machinery can use the structured guidance to understand the physics and mechanics behind each cut or hole drilled. While seasoned contractors and commercial tradespeople likely know these procedures by second nature, the manual provides a solid foundation for casual makers and repair hobbyists.
In terms of practical utility, the guide addresses real-world garage operations including torque management, correct drill bit selection, cutting feed rates, and blade alignment. Understanding how blade teeth geometry and feed speed affect tear-out or kickback directly impacts cutting accuracy and project quality. The text outlines safe workholding techniques, showing users how clamps and proper stances reduce fatigue and improve tool control on repetitive tasks like ripping lumber or driving heavy structural fasteners.
The physical manual features a standard paperback format that fits neatly on a workshop shelf or inside a deep tool cabinet drawer. Its large page footprint allows for readable typography and clear reference layouts, making it practical to consult while prepping a project on the workbench. In addition to daily operation, the guide details essential maintenance procedures like cleaning resin from saw blades, checking cord integrity, storing lithium-ion batteries properly, and keeping motor vents free of compacted dust.
As with any print manual, there are practical limitations to keep in mind. The standard paperback binding can pick up grease, oil, and moisture if left exposed near automotive repair bays or damp basement benches. Furthermore, the instructional scope emphasizes standard handheld tools and common benchtop machines, meaning specialized metalworking, commercial fabrication, and advanced CNC routing are outside its focus.
For anyone setting up a home workshop or looking to develop safe, repeatable habits with power tools, this manual offers dependable advice. It provides a structured approach to workshop safety, equipment care, and tool handling that helps DIY users work with greater confidence and get better results on their projects.
The instructional content emphasizes repeatable workshop habits that directly influence job quality. By detailing proper feed rates, spindle speeds, and workpiece support, the manual helps users achieve cleaner cuts, reduce splintering, and eliminate bit wandering during critical drilling operations.
The chapters dedicated to dust extraction, blade tracking, and tool ergonomics provide actionable recommendations that keep garage workspaces cleaner and safer. Readers can apply these practices immediately to improve both workflow speed and project precision.
Long-term equipment performance depends on regular maintenance, and this guide provides straightforward inspection routines for power cords, switches, chucks, and battery contacts. Following these guidelines helps prevent motor burnout and premature wear on drive gears.
The manual also covers practical garage organization, offering suggestions on hanging stations, modular toolboxes, and dry storage areas that protect delicate electronic controls and cutting accessories from humidity and workshop grime.
Essential Principles for Safe and Accurate Table Saw Operation
Safe operation of a table saw centers on controlling your workpiece through three distinct spatial planes. The flat table surface controls your vertical reference, the rip fence or miter gauge establishes your lateral alignment, and your hands or push sticks govern feed rate and forward momentum. If the wood loses firm contact with any of these guiding planes during a pass, the blade teeth can grab the stock and cause severe kickback or rough, inaccurate edges. Developing consistent muscle memory around tool setup and stance will help you achieve clean, furniture-grade results on every pass.
Understanding Core Components and Alignment Checks
Every standard table saw relies on several critical mechanical parts that work in unison. The motor drives an arbor shaft, which holds the rotating blade perpendicular to the ground under standard conditions. Surrounding the blade is the throat plate, which provides clearance for the teeth while supporting the surrounding wood fibers. The rip fence locks onto front and rear guide rails parallel to the blade, while miter slots running alongside the blade allow specialized crosscut gauges and shop-made sleds to travel smoothly across the cast iron or aluminum top.
Accurate cutting is impossible if your fence and blade are not parallel to the miter slot. Before making any critical cuts, disconnect the power cord or remove the battery pack to inspect mechanical alignment safely. Measure the distance from a marked blade tooth to the right-hand miter slot at the front of the blade opening, then rotate that exact same tooth to the rear and measure again. The two measurements should match within a few thousandths of an inch to prevent the rising teeth at the back of the cut from burning or pinching the wood.
Next, align your rip fence so it runs completely parallel to that same miter slot. Some woodworkers prefer to adjust the rear of the fence to toe out away from the blade by a tiny fraction of an inch to prevent friction on the offcut. A fence that toes inward toward the rear of the blade creates an immediate pinch point, which drastically increases the hazard of violent material ejection. Comprehensive workshop literature such as the Complete Table Saw Book, Revised Edition published by Fox Chapel Publishing walks through these vital tune-up procedures in detail.
Choosing the Proper Blade for the Cut
Using the wrong blade for your specific material or cut orientation leads to burning, motor strain, and ragged tear-out. Table saw blades generally fall into three common categories: dedicated rip blades, dedicated crosscut blades, and general-purpose combination blades. Rip blades feature a lower tooth count, typically between 24 and 30 teeth on a standard 10-inch blade, along with deep gullets designed to clear away long wood shavings when cutting parallel to the grain. Attempting to rip thick hardwood stock with an 80-tooth blade will inevitably cause excessive heat buildup and blade binding.
Crosscut blades feature higher tooth counts, often ranging between 60 and 80 teeth, designed to slice cleanly across delicate wood fibers without splintering. These blades utilize alternate top bevel tooth geometries that act like tiny knives severing the grain along the outer edges of the cut. While an 80-tooth crosscut blade produces pristine edges on plywood and trim moldings, feeding lumber lengthwise through it can overheat the plate and cause permanent warping. For general DIY chores, a 40-tooth or 50-tooth combination blade offers a balanced middle ground for mixed ripping and crosscutting tasks.
Kerf width represents another crucial blade specification to evaluate before turning on your machine. Full-kerf blades measure approximately one-eighth of an inch thick and require substantial motor power to drive through dense lumber. Thin-kerf blades measure around three-thirty-seconds of an inch, removing less material and reducing the workload on compact benchtop or jobsite saws. Always verify that your riving knife thickness matches your chosen blade plate and kerf width to maintain proper safety clearances.
Table Saw Safety Essentials and Kickback Prevention
Kickback occurs when a workpiece pinches against the rising teeth at the rear of the blade, or twists away from the fence and rides up on the teeth. The spinning blade instantly catches the board and launches it backward toward the operator at highway speeds. A modern riving knife is the single most effective safety device for preventing this reaction because it sits directly behind the blade and matches its curvature. As the wood separates during a cut, the riving knife prevents the kerf from closing and keeps the board aligned against the fence.
Never operate your saw without the riving knife, splitter, or blade guard installed unless performing specialized non-through cuts like dadoes or rabbets. In addition to installed safety equipment, your body positioning acts as an active line of defense. Stand slightly to the left or right of the blade path rather than directly behind the workpiece. If an unexpected bind does occur and projects the wood backward, your torso will remain safely out of the direct line of fire.
Always keep your hands away from the blade danger zone, which extends at least six inches around the spinning perimeter. Whenever your rip cut leaves less than six inches between the fence and the blade, switch immediately to a sturdy push stick or sacrificial push block. Push blocks that hook over the rear of the board while exerting downward pressure across the top offer superior control compared to narrow notched sticks. Wearing safety glasses, hearing protection, and avoiding loose clothing or jewelry are non-negotiable rules in every workshop environment.
Making Accurate Rip Cuts Step by Step
Ripping lumber lengthwise along its grain is the primary task table saws perform best. Begin by inspecting your stock to confirm that the edge running against the fence is completely straight and true. Feeding a warped, cupped, or bowed board along the rip fence is a leading cause of blade binding and dangerous tool stalls. If your board has a crooked edge, joint it flat first using a hand plane, jointer, or a dedicated straight-line ripping jig before bringing it to the saw.
Set your blade height so the carbide tips project roughly one-eighth to one-quarter of an inch above the top surface of the workpiece. Raising the blade excessively high increases the hazard zone and changes the cutting angle, while setting it too low can cause teeth to chatter and burn the cut face. Measure and lock your rip fence at the desired width using the built-in scale, but always verify the distance from the inside fence face to the near blade tooth with a reliable metal rule or tape measure.
Position your hands with intention before starting the motor. Your left hand should apply steady inward pressure to keep the board flush against the rip fence ahead of the blade, while your right hand provides forward feed momentum. Maintain this dual pressure throughout the pass, transitioning your right hand to a push block as the tail end of the board approaches the table edge. Push the board completely past the rear of the blade and riving knife before letting go, and never reach over the spinning blade to retrieve the offcut piece.
Executing Clean Crosscuts with a Miter Gauge or Sled
Crosscutting involves cutting across the grain of a board, usually to trim a piece to finished length. The most critical safety rule for crosscutting on a table saw is to never use the rip fence and the miter gauge at the same time. When a board is guided by the miter gauge while trapped between the blade and the locked rip fence, the cutoff piece can twist slightly, pinch the blade, and cause violent kickback. If you need repeatable crosscuts, clamp a small scrap block to the fence well before the blade to serve as a clearance stop.
Inspect your miter gauge to ensure the face sits exactly perpendicular to the miter slot. Most stock miter gauges feature small indexing stops at 90 degrees and 45 degrees, but you should verify these angles with a reliable machinist square. Attaching an auxiliary wooden fence to the miter gauge face provides greater support for long boards and helps minimize chip-out on the back edge of your cuts. Slide the gauge smoothly forward at a moderate, continuous pace without rushing the motor.
For dedicated fine woodworking and small trim, building a crosscut sled is widely considered one of the best workshop upgrades. A sled rides in both miter slots simultaneously and carries the workpiece over the blade on a zero-clearance base, virtually eliminating tear-out on delicate fibers. For specialized angled cutting or crown molding, woodworkers often combine table saw work with a dedicated chop saw. You can explore our detailed guide on cutting quarter round with a miter saw to see how dedicated pivoting tools complement primary shop machinery.
Handling Large Sheet Goods and Workpiece Support
Cutting full four-by-eight-foot sheets of plywood or medium density fiberboard on a standard table saw presents unique balance challenges. Attempting to maneuver a heavy, bulky panel across a small benchtop saw single-handedly often results in tipped machines, uneven cuts, and dropped stock. To manage large sheet goods safely, you must provide continuous auxiliary support on both the infeed and outfeed sides of your work table.
Outfeed roller stands, dedicated outfeed tables, or modular saw horses positioned at the exact height of your saw table ensure long panels do not sag or lift as they clear the rear of the blade. If a panel tips downward after passing the blade, it lifts the front end off the table and binds against the top teeth. Ensure your outfeed support sits level or roughly one-sixteenth of an inch lower than the main table bed so boards slide across without catching on metal edges.
When working solo in a compact garage, breaking down full plywood sheets into manageable rough dimensions with a handheld track saw or circular saw before final dimensioning on the table saw is a wise approach. This two-stage workflow saves your back and ensures that every final pass on the table saw involves a workpiece you can easily hold flat against the fence. Broad workshop guides such as How to Use Power Tools: A DIY Guide to Selecting from Majosta emphasize this balanced strategy across various stationary and portable tools.
Dust Collection, Maintenance, and Calibration
A table saw generates a tremendous volume of fine wood dust that quickly coats shop surfaces, enters your respiratory system, and fouls mechanical trunnions. Most modern saws feature a dedicated dust shroud beneath the blade connected to a rear dust collection port. Connecting this port to a shop vacuum or dedicated dust extractor removes debris directly at the source, preventing fine particles from building up inside the elevation gears and bevel worm drives.
Regular maintenance keeps the machine running smoothly and prevents premature motor burnout. Periodically clean pitch and adhesive resin from your saw blades using dedicated blade cleaning solution or mild citrus solvent. Built-up resin on tooth faces increases friction, causes the blade to wander in dense grain, and generates excessive heat that dulls the carbide cutting edges. Once clean, dry the blade thoroughly and treat it with a dry silicone-free lubricant to resist future resin accumulation.
Keep the tabletop surface clean and protected from rust. For cast iron surfaces, apply a high-grade paste wax or specialized table lubricant periodically to eliminate surface drag and prevent oxidation caused by workshop humidity. A slick table surface reduces the manual feed force required to push boards, which translates directly into better control and smoother cuts. For users managing multiple cutting machines in a shared workspace, resources like the New Complete Guide to Band Saws provide valuable parallel advice on machine maintenance and alignment.
Tool Selection and Workshop Reference Guides
Navigating the various types of saws available on the modern market requires matching your workspace constraints with your construction goals. Benchtop and compact jobsite saws cater to contractors and remodelers who need portability and easy storage, though their smaller tables require extra care when supporting wide boards. Contractor saws and cast iron cabinet saws provide massive mass, low vibration, and extended rip capacities ideal for permanent home workshops and cabinetmaking shops.
Building a solid reference library is one of the most cost-effective ways to advance your woodworking skills without making dangerous mistakes. Books like the HOW TO USE A MITER SAW: A Beginner’s Guide provide valuable cross-training on workshop joinery, helping users understand when a stationary miter tool is better suited for crosscuts than a table saw. Reading comprehensive literature before attempting intricate joinery or custom jig fabrication gives you clear mental models of material behavior under blade tension.
Whether you choose to invest in specialized reference manuals or rely on equipment documentation, always keep the manufacturer operating manual near your workstation. Checking torque specifications for arbor nuts, adjusting belt tension, and calibrating electronic digital fences all depend on exact model configurations. Taking time to verify these mechanical specifications ensures your equipment remains reliable and precise throughout years of heavy workshop use.
Final Operating Verification and Safe Habits
Developing a standardized pre-cut checklist will keep you grounded and focused every time you enter the workshop. Before starting the motor, mentally rehearse the entire cut from initial infeed contact through final outfeed clearance. Verify that your push stick sits within arm’s reach, that your path across the table is completely unobstructed, and that the blade height and fence locks are fully tightened. Once the cut begins, concentrate fully on keeping the stock flat against the table and flush against the fence until the blade stops completely.






Write Your Review
No reviews yet. Be the first to share your experience!