


Dense hardwood logs can quickly expose mechanical weaknesses in outdoor power equipment. When a chainsaw engine roars under throttle but the cutting chain chatters, binds, or refuses to turn through timber, the drive system is often suffering from mechanical breakdown. Every powerhead relies on a chainsaw sprocket to transfer rotational torque directly from the crankshaft or electric motor into the cutting loop. Understanding what is chainsaw sprocket construction, wear limits, and drive geometry allows operators to avoid catastrophic chain derailment and maintain peak timber-cutting efficiency.
Chainsaws demand balanced mechanical harmony between the powerhead, guide bar, and cutting chain loop. When processing heating wood or learning how to swing an axe for manual splitting, reliable cutting equipment prevents fatigue and downtime. A neglected drive sprocket accelerates chain stretch, damages guide bar rails, and strains engine clutches under moderate cutting loads. Learning how these grooved drive components function helps property owners and woodcutters diagnose operational symptoms before expensive mechanical damage occurs.


Understanding Chainsaw Drive Sprockets and Power Transmission
A chainsaw drive sprocket is the toothed wheel that physically engages the drive links of a saw chain to propel the cutters around the guide bar. Positioned directly behind the clutch cover on the side of the powerhead, this component transfers engine torque into cutting action. Without an intact sprocket matching chain pitch, a saw cannot pull through wood fibers regardless of motor power.
The Core Mechanics of Chainsaw Drive Sprockets
On gas powerheads, the drive sprocket mounts directly beside or forms a single piece with the clutch drum. The crankshaft spins a centrifugal clutch assembly equipped with weighted shoes and retention springs. As engine speed climbs above idle to roughly 3,500 revolutions per minute, centrifugal force pushes the clutch shoes outward against the drum. This friction engagement locks the drum to the spinning crankshaft, forcing the sprocket teeth to drive the saw chain forward.
The sprocket teeth mesh specifically with the pointed drive links along the bottom of the chain loop. These drive links ride inside the guide bar groove, pulling lubricant from the oiler port along the bar rails. Because the sprocket bears the full load of pulling sharp teeth through timber, it endures extreme friction and rotational stress. Dimensional mismatches between sprocket teeth and chain drive links cause harsh vibration, accelerated bar wear, and poor cutting speed.
Spur Sprockets Versus Floating Rim Systems
Outdoor power tools utilize two main drive designs: spur sprockets and floating rim sprockets. A spur sprocket features drive teeth permanently welded or cast onto the outer face of the clutch drum. Models such as the JSCJCAS 325″-7T Clutch Drive Sprocket Drum and the Poulan 501628301 Sprocket Clutch Drum illustrate this one-piece design. Spur drums are common on homeowner chainsaws because they provide an economical, durable assembly that simplifies manufacturing.
Spur sprockets carry distinct operational traits that woodcutters must recognize during routine maintenance. Because the teeth are fixed to the drum, the saw chain must be aligned onto the star teeth during bar installation. Individual teeth contact chain drive tangs at fixed points, concentrating wear grooves across the star face over extended cutting seasons. When a spur sprocket develops deep wear grooves, the entire clutch drum must be replaced.
Floating rim sprockets use a modular two-piece design preferred on professional timber-cutting chainsaws. A splined hub is welded to the drum, and a replaceable rim sprocket slides freely along the splines. Small internal guide walls on the rim cradle the drive links, keeping the chain aligned with the bar entry slot. This floating lateral movement allows the rim to align with the bar groove as cutting angles change, reducing binding friction.
Electric and Cordless Drive Gears Versus Gas Engine Drums
Corded electric chainsaws and battery pole saws often rely on specialized reduction gear assemblies rather than traditional centrifugal clutch drums. Saws like the Remington electric series utilize components such as the 107713-01 Sprocket Gear for Remington Electric chainsaws. This part combines a large ABS plastic gear with a central 5-tooth metal drive sprocket gear. The composite gear meshes with a motor pinion to reduce high electric motor speeds into usable cutting torque.
Electric drive sprockets manage different torque characteristics than two-stroke gas powerheads. Electric motors deliver instant torque the moment the trigger is engaged, placing sharp shock loads on gear teeth if the chain binds. The engineered ABS plastic surrounding the metal sprocket acts as a mechanical fuse in these residential tools. If the guide bar pinches, the plastic gear teeth shear before the electric motor overheats or damages internal housing components.
Compact cordless saws also employ dedicated metal drive sprockets engineered for low-profile chains. Replacement parts like the 2 Pack 612313001 Sprocket for Ryobi Homelite P548 and the Ryobi P541 P542 Chainsaw Replacement Sprocket # 610323001 demonstrate compact metal drive wheels designed for battery powerheads. These sprockets optimize chain speed while minimizing drag on battery capacity. Keeping electric sprockets clean of packed sawdust prevents parasitic drag that shortens battery runtime.
Matching Sprocket Pitch, Tooth Count, and Chain Specifications
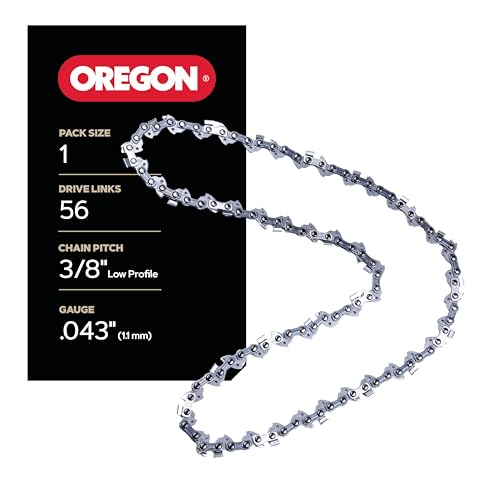
A chainsaw cutting system requires a strict mechanical match among the drive sprocket, guide bar, and saw chain loop. Pitch represents the distance between any three consecutive rivets divided by two, commonly sized in 1/4-inch, 3/8-inch Low Profile, or .325-inch dimensions. A sprocket stamped for .325-inch pitch features tooth spacing calibrated exclusively for .325-inch chain drive links. Running 3/8-inch chain over a .325-inch sprocket causes drive links to ride on tooth tips, risking derailment.
Tooth count on a drive sprocket directly affects chain speed and engine cutting torque. Standard sprockets for mid-size chainsaws typically feature 7 teeth, while smaller electric or pruning saws use 5-tooth or 6-tooth configurations to maximize torque from smaller motors. Increasing tooth count increases surface feet per minute chain speed for clean cuts in small softwood. However, larger tooth counts reduce mechanical leverage, causing smaller engines to bog down in dense hardwood logs.
Chain gauge must also be verified when maintaining the cutting loop, referring to drive link thickness rather than tooth pitch. Drive links must slide smoothly through sprocket teeth without excessive lateral play. If an operator installs an incorrect chain pitch or runs a severely stretched chain over a new sprocket, mismatched drive tangs gouge the pockets. Checking stamped markings on your clutch drum ensures the replacement sprocket matches your guide bar tail.
Diagnosing Sprocket Wear and Warning Signs
Drive sprockets are consumable wear items that degrade through timber-cutting friction. The standard guideline specifies that a sprocket should be replaced when wear grooves exceed 0.020 inches in depth. You can measure this groove depth using a depth gauge tool or the edge of a standard dime as a quick reference. When grooves wear deeper than 0.020 inches, drive links bottom out in the pockets, stretching the chain tie straps.
Operational warning signs often reveal a worn sprocket before visual inspection takes place. If you notice your saw chain rattling around the powerhead, binding as it enters the bar tail, or throwing off the bar, inspect the drive sprocket. Worn sprockets develop hooked profiles on their drive teeth that snag the trailing edge of drive links. This snagging jerks the chain, causing erratic cutting chatter and accelerated bar rail burning.
Inspecting the underside of your saw chain provides further clues regarding sprocket condition. Worn sprockets mushroom the bottoms of the drive link tangs, creating sharp metal burrs that bind inside the guide bar groove. If new chains develop battered drive tangs or tight spots during manual rotation, the sprocket teeth are badly grooved. Running fresh chains over a severely worn drive sprocket will ruin a new chain loop within hours of cutting.
Step-by-Step Sprocket and Needle Bearing Replacement
Replacing a worn chainsaw sprocket requires methodical mechanical disassembly and basic safety precautions. Before beginning work, ensure the powerhead cannot start by disconnecting the spark plug boot on gas saws or removing the battery pack on cordless models. Release the manual chain brake by pulling the front hand guard backward toward the top handle. Remove the bar retaining nuts, take off the clutch cover, and pull the bar and chain away.
On gas chainsaws with outboard clutch assemblies, accessing the sprocket requires removing the centrifugal clutch spider. Remove the spark plug and feed clean starter rope into the combustion chamber to lock the piston at top dead center. Remember that chainsaw clutch hubs feature reverse threads, meaning you must turn the clutch clockwise to loosen and remove it. Once the clutch unthreads from the crankshaft, slide off the clutch drum assembly to inspect the sprocket.
Every clutch drum rotates over a caged needle bearing seated directly on the crankshaft snout. When installing a replacement drum, such as the JSCJCAS drum kit that includes a fresh bearing, thoroughly clean the crankshaft surface. Apply a thin coat of high-temperature lithium or bearing grease to the needle rollers before sliding the new drum into place. A dry needle bearing quickly overheats, seizing the drum to the crankshaft and causing the chain to spin at idle.
Chain Tensioning and the Two-Chain Rotation Principle
Proper chain tensioning plays a direct role in preserving the service life of drive sprockets. An excessively tight chain exerts continuous downward force against the sprocket teeth, accelerating grooving and overloading the crankshaft bearing. Conversely, a loose chain flops into the sprocket pockets under throttle, hammering the tooth faces rather than engaging them smoothly. Tension your chain using the snap test so drive links remain seated while the chain pulls cleanly by gloved hand.
Experienced woodcutters frequently practice the two-chain rotation strategy to optimize drive component life. Saw chains naturally stretch and wear down their drive link tangs over time, altering how they seat against sprocket teeth. If you run one single chain until it is completely worn out, it cuts a deep wear pattern into the sprocket that will reject a new chain. Rotating two or three chains across the same sprocket ensures all components wear at an even rate.
When those rotated chains reach the end of their sharpening lifespans, the drive sprocket should be replaced alongside them. Installing a fresh sprocket when mounting new chains ensures uniform pitch contact across all drive components. This synchronized replacement schedule eliminates chain jumping, reduces vibration through the handles, and protects the guide bar tail from uneven rail spread.
Worksite Clearance and Protecting the Cutting System
Operating conditions and cutting cleanliness directly affect how quickly grit grinds down drive sprockets. When working around thick undergrowth or preparing a woodlot for felling, clearing tangled brush with a dedicated brush cutter for clearing saplings keeps low-lying woody debris and hidden soil away from your chainsaw workspace. Cutting into dirty bark pulls abrasive silica into the guide bar groove. This gritty slurry travels into the sprocket pockets, acting like grinding compound against the teeth.
Routine powerhead maintenance must include flushing packed debris from the sprocket housing. Sawdust saturated with tacky bar oil readily packs between the clutch drum, the oil pump drive gear, and the chain brake band. If this sticky residue hardens, it prevents the chain brake band from fully releasing, causing continuous friction drag that overheats the clutch drum. Use a scrench or stiff brush to clean out the clutch cavity every time you flip the guide bar.
Always check that your powerhead oiler is delivering adequate bar and chain lubricant to the cutting loop. Hold the running saw tip over a clean stump or scrap cardboard and rev the engine to confirm a fine line of oil slashes across the surface. Proper lubrication reduces metal friction as chain drive links enter and exit sprocket teeth under heavy load. A well-lubricated drive system runs cooler, delivers maximum torque, and prevents premature metal fatigue across the powerhead.
Maintaining a sharp, functional cutting system requires viewing the drive sprocket as the vital foundation of chain movement. By regularly inspecting tooth groove depth, matching pitch specifications accurately, and lubricating the supporting needle bearing, woodcutters protect both their powerhead investment and their personal safety. A fresh drive sprocket ensures smooth chain acceleration, prevents dangerous derailments, and keeps your saw biting cleanly through firewood.




Write Your Review
No reviews yet. Be the first to share your experience!